
The RS-1 IOT sprinkler operates very differently from other irrigation systems. The boundaries of complex areas of irrigation (Zones — for lawns) and points of water delivery (Spots — for bushes and trees) are determined by software control rather than by complex piping and sprinkler tweaking. With a few minutes of practice, you will master the art of irrigation by Graphic Design by following these simple instructions:
RS-1 sprinklers have a convenient “Squirt” mechanism for acknowledging your presence. A 6 second jet of water will be sent out from the sprinkler. Squirts occur to acknowledge the following three events:
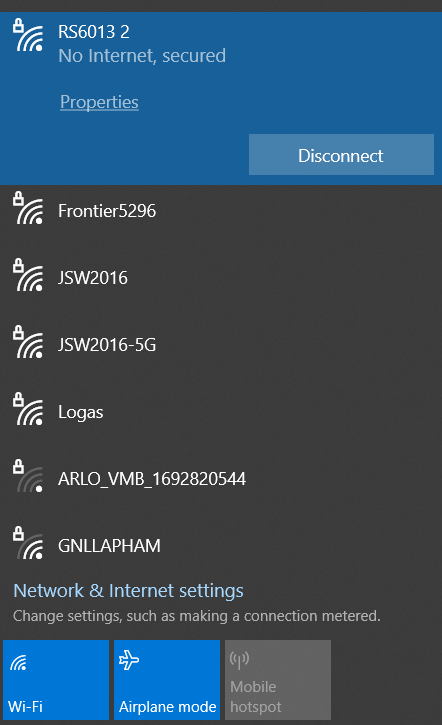
Each RS-1 sprinkler has a unique serial number that looks like “RS90001”. When an RS-1’s WiFi AP is active, its unique serial number will appear in the list of Available Networks in the “Settings” of your mobile device.
To access a sprinkler, connect to it as you would to any new network in a new environment (i. e such as a new restaurant or friend’s house). Initially, there will be no password required to logon to the sprinkler.
If you choose to run in “Standalone” mode, you can add a password at any time later. If you decide to join Cloud Control, you must choose and use a password. (Necessary to protect your internet gateway from public exposure). Your password will be remembered by your mobile device (as all other WiFi AP passwords are).
If you forget your password, you can have it sent to your email address by gently shaking the RS-1 in question for 10 seconds. You will feel dumb while doing this, but you forgot the password…
If you forgot your password AND the RS-1 has lost connectivity to your internet gateway, there is a Factory Reset mechanism (described below) that will enable you to recover access to the RS-1.
Creating the connection to an RS-1 WiFi AP establishes a private network between your mobile device and the RS-1 sprinkler. You are not connected to the internet, and your browser will tell you this, probably several times. Do not worry, please proceed.
In your browser’s address bar, type www.rainstreamer.com. This action will load the RS-1 embedded website into your browser. All RS-1 control actions will occur inside this website.
The first time that you log on to your RS-1, you will see a greeting logo banner for several seconds, followed by a Sprinkler Setup Message.

You will then be guided to the Sprinkler Setup page, where you will enter some operational parameters. Most are self-explanatory. The most significant choice is the Sprinkler Mode, described as follows (you can easily change modes or any other parameter later using the RS-1’s Control Panel):

This is the simplest application of the RS-1. You program the location of the RS-1’s Zones and Spots, followed by the days, times and amounts of water that you would like the RS-1 to provide.
The RS-1 will continuously operate on your watering schedule for days, weeks or years, until you log back on and re-program it.
If you power the system off for ANY length of time, the RS-1’s internal battery backed up clock will maintain the correct data and time and resume the watering schedule when the power is restored.

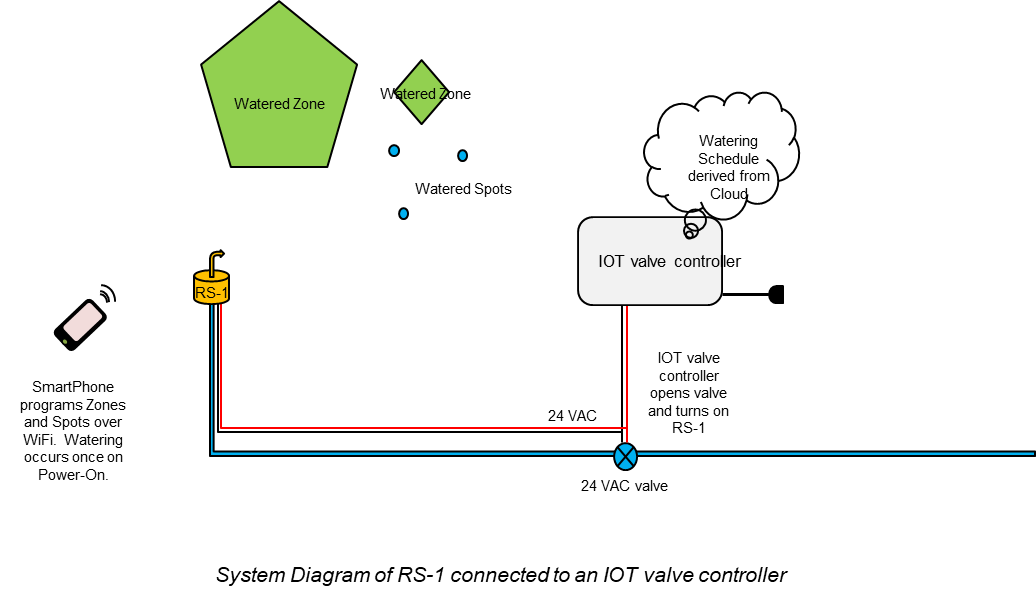
The RS-1 can be connected to conventional 24 VAC Valve Controllers.
In this mode, Zones and Spots are programmed by the RS-1 user (defining WHERE the watering will take place). The schedule (WHEN the watering happens) is controlled by a separate conventional or IOT based timer.
Since the implementation of a system of RS-1’s in Valve Controller Mode requires special wiring and co-ordination with an external timer mechanism, its use in simple Home systems is not recommended.
In this mode of operation, the Zones and Spots and their associated schedule are programmed in the same fashion as in Standalone mode.
Cloud Control network services enable powerful Reporting and Control features, including:
You must sign up for a Cloud Control subscription to use Cloud Control mode. Cloud Control mode setup requires you to enter your email address and the SSID and password of an internet connected gateway.
You must be able to successfully WiFi connect to the internet gateway to use Cloud Control.
As noted above, you also must choose a password for your RS-1.
In Cloud Control mode, your RS-1 acts simultaneously as an AP (an Access Point on a private network) and as a STA (Station on the internet connect gateway).
Connecting your mobile device to the RS-1 AP will not connect you to the internet, even if you have successfully enabled Cloud Control on your RS-1 and internet gateway.

After entering all parameters in the chosen mode, you will be guided to the Calibration Screen. Calibration is required to establish the RS-1’s internal 0 degree axis.
All zones and spots will be placed relative to this axis. Any direction can be chosen, but we recommend that you align your 0 axis with the edge of a lawn or a tree or some other property landmark.
Use the arrow buttons to move the nozzle clockwise or counter-clockwise. Use the Squirt button to send a 6 second jet of water to full flow to verify your selected angle.
When you are satisfied, use the Calibrate button to complete and record the Calibration.
You are now ready to create Zone and Spots using the Zone/Spot Plan. Clicking the Next button will take you there.
Please refer to the Zone/Spot Plan management guide for complete details.

For the first 6 hours of use in a brand new RS-1’s deployment AND until a successful calibration is completed (i. e. the longer of these two conditions), the RS-1’s WiFi AP will stay continuously ON.
During this interval, Embedded Web Site logons (i. e. www.rainstreamer.com ) will bring up the Startup Banner and SetUp Screen.
Any parameter can be easily done using the SetUp Screen’s parameters. After this interval, Embedded Web Site logons will bring you directly to the Zone Spot plan, bypassing Setup and Calibration.Changes to all parameters (including a Re-Calibration) may then be made in the Control Panel, accessed by pushing the Control Panel button in the Zone/Spot Plan.
For the first 6 hours of use in a brand new RS-1’s deployment AND until a successful calibration is completed (i. e. the longer of these two conditions) the RS-1 will automatically and continuously appear as a WiFi AP in your device’s Settings.
After this period expires, the RS-1 will de-activate its AP. You must tap the sprinkler to re-activate its WiFi AP. The sprinkler will squirt to acknowledge this tap and simultaneous re-activation.
The reason for this de-activation is to prevent a large number of RS-1s in a large installation from simultaneously and continuously appearing in a long, confusing list of available networks.
A re-activated RS-1 WiFi AP will remain active for 1 hour, and then will automatically shut its AP access off. You can also force an immediate WiFi de-activation in the Control Panel section